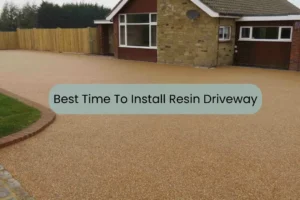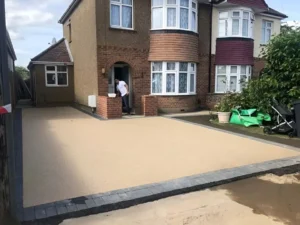
A resin bound driveway can completely transform the look of your home. It’s smooth, durable, low maintenance and environmentally friendly, but only if it’s laid on the right foundation. The strength and lifespan of any resin surface depend entirely on how well the base is prepared before installation.
At BH Resin Bound Specialist, we know that every successful project begins with groundwork. Preparing the base isn’t the most glamorous stage, yet it’s the one that determines how well your driveway performs through years of rain, frost, and heat. In this guide, we’ll explain the correct way to prepare your driveway base, what materials to use, and how professionals ensure lasting results.
Why the Base Matters in Resin Driveway Installation
A resin surfae is only as good as the base beneath it. The resin bound aggregate layer is relatively thin — usually around 18 mm to 24 mm — so any weakness in the sub-base quickly shows through. Without a stable foundation, cracks, dips or puddles can appear within a year or two.
The base has two main jobs. First, it provides strength and load-bearing support so vehicles can drive and park without causing movement underneath. Second, it manages drainage. Modern resin systems are designed to be SuDS compliant, meaning they allow water to pass through rather than running off into drains. To work properly, the base must also be permeable.
A well-prepared base keeps the resin surface level, prevents water build-up, and stops frost damage during winter. In short, if you want a long-lasting driveway, start with the right foundation.
Step-by-Step Guide to Preparing the Base
1. Check the Existing Surface
The first step is assessing whether the current driveway can be reused. A solid concrete or tarmac base can often stay in place if it’s in good condition. Inspect for cracks, oil stains, loose areas or drainage issues. Any weak sections should be removed and replaced. If the surface isn’t level, this is the time to correct it.
If the old base is crumbling or retains standing water after rainfall, it’s better to start fresh. Resin needs a dry, stable substrate to bond properly.
2. Excavate and Level the Area
If you’re starting from scratch, the area should be excavated to a depth of around 150 mm – 200 mm for domestic driveways. The exact depth depends on expected vehicle loads and ground conditions. Soft soil, clay or organic material must be removed completely, as these can shift over time.
Once excavation is complete, the area is levelled and compacted. This forms the foundation for the next layer: the sub-base. The most common material is MOT Type 3 aggregate, which is permeable, stable, and ideal for resin bound surfacing. It’s laid in layers and compacted thoroughly to prevent future movement.
3. Compact the Sub-Base
Proper compaction is what separates a professional installation from a short-term fix. Installers use a vibrating plate compactor or roller to press the aggregate until it becomes firm and even. Each layer should be compacted before the next one is added.
If the sub-base isn’t compacted correctly, the finished driveway can sink in places or develop cracks. It’s also important to maintain the right gradient — typically around 1:60 – 1:80 — to allow natural surface water drainage.
4. Install Drainage and Ensure SuDS Compliance
Drainage is a key part of preparing a resin driveway base. Because resin bound surfaces are permeable, water needs somewhere to go. A SuDS-compliant base uses open-graded aggregate to let rain soak through and disperse naturally.
In some areas with heavy rainfall, additional drainage channels or soakaways may be fitted beneath or alongside the sub-base. These prevent pooling and protect nearby walls or flowerbeds from water damage. A properly designed base avoids future maintenance headaches.
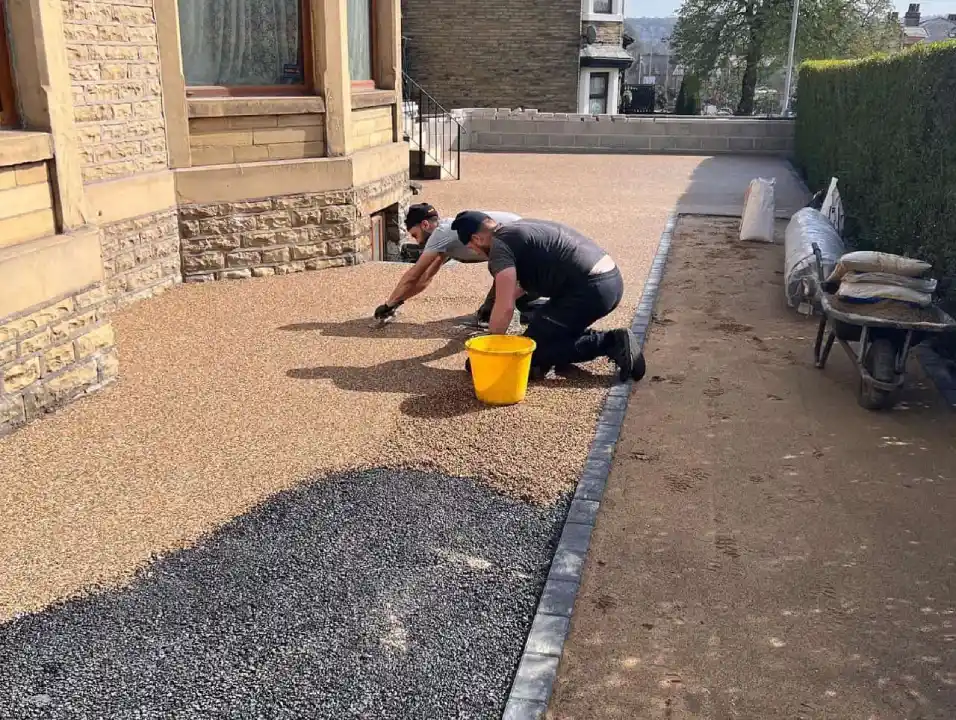
5. Add the Binder Course or Base Layer
Above the sub-base sits the binder course, usually made from tarmac or concrete. For resin bound systems, the binder layer must also allow permeability if SuDS compliance is required.
Tarmac is a popular choice because it bonds well with resin and offers flexibility during temperature changes. Concrete is also acceptable if it’s fully cured and has a textured finish to help the resin grip. Smooth concrete should be roughened before application to create a mechanical key.
This layer should be clean, dry and dust-free before resin is laid. Any contaminants, oil or algae can affect adhesion and lead to delamination later on.
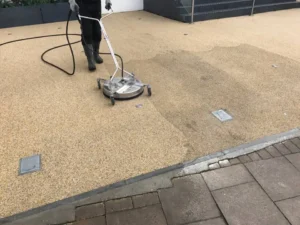
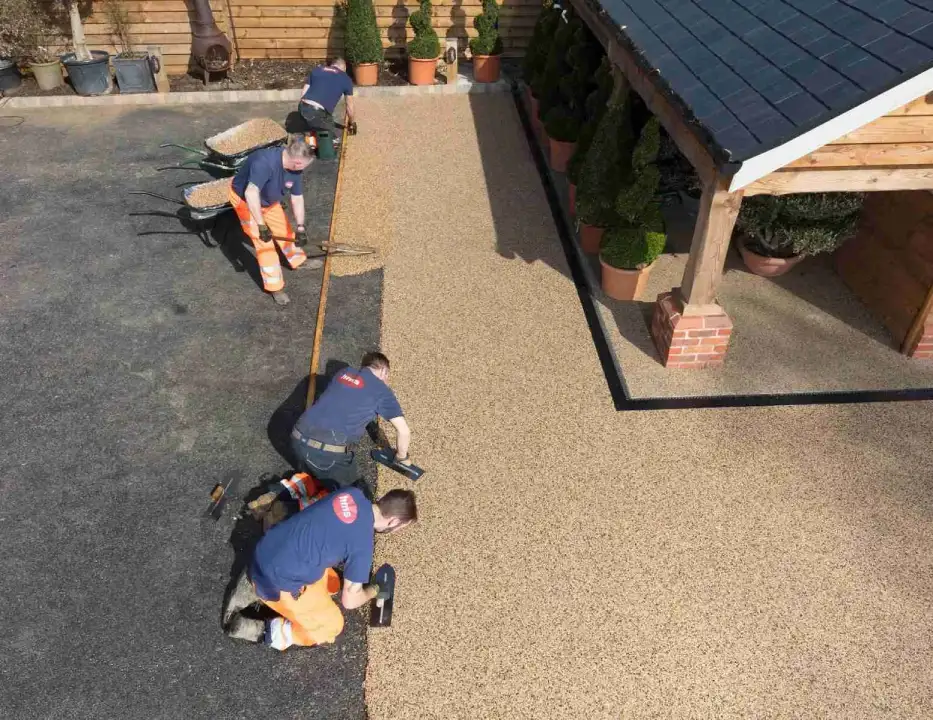
6. Carry Out Final Surface Checks
Before mixing the resin, professionals carry out a full inspection of the base. The surface must be dry, level and at a suitable temperature — ideally between 10 °C and 25 °C.
Moisture is the biggest risk during installation. Even slight dampness or early-morning dew can react with the resin, causing cloudy patches or weak bonding. For that reason, installers always check the dew point, ground temperature, and forecast before work begins.
Once these checks are complete, the base is ready for the resin bound aggregate mix to be applied and trowelled to a smooth finish.
Choosing the Right Base Materials
The materials used beneath a resin driveway are just as important as the visible surface. In areas with mild, wet weather, a free-draining base such as MOT Type 3 aggregate is ideal. It allows water to soak through quickly, protecting the resin layer from standing moisture.
Where ground conditions are heavier or clay-based, a stronger Type 1 aggregate may be used, combined with a suitable drainage solution. Both options should be compacted and levelled carefully to create an even, load-bearing platform.
Professional installers adapt their method depending on the site, ensuring the base can handle local weather patterns, vehicle weight and soil composition. This tailored approach guarantees consistent performance in all seasons.
Common Mistakes to Avoid During Base Preparation
Even small shortcuts can lead to major problems later. Here are a few mistakes that cause premature surface failure:
- Poor compaction: Loose or uneven sub-base material allows the surface to move and crack.
- Insufficient depth: A shallow base cannot support heavy vehicles and may rut under pressure.
- Using impermeable materials: Non-draining layers trap water and create damp patches.
- Ignoring ground moisture: Laying resin on a wet base weakens the bond between layers.
- Skipping curing time: Concrete or tarmac bases must fully cure before resin is added, otherwise moisture becomes trapped underneath.
Avoiding these errors ensures a driveway that looks better, lasts longer and needs less maintenance over time.
How Professionals Ensure Long-Lasting Results
Experienced installers know that attention to detail during preparation prevents costly repairs later. At BH Resin Bound Specialist, we follow the standards outlined in BS 7533 for paving design and installation. Every project begins with a detailed site assessment, where ground conditions, drainage routes and moisture levels are recorded.
We use calibrated equipment to measure compaction levels and ensure the sub-base meets strength requirements. Before laying the resin, the team checks weather data, temperature and humidity using readings from trusted sources such as the Met Office.
Our process guarantees a solid, even and SuDS-compliant base — the essential foundation for any resin bound surface built to last.
Final Thoughts
Preparing a driveway base correctly might take time, but it’s what separates a surface that lasts for decades from one that fails after just a few years. Every stage of the process, from excavation and compaction to proper drainage, plays a part in creating a strong, reliable foundation.
If you’re planning a new resin driveway, make sure the groundwork is done properly. Or better still, let the professionals take care of it. At BH Resin Bound Specialist, our team follows British Standards to deliver driveways that perform perfectly in all weather and keep your home looking its best year after year.
Start your project with a base built to last. Get in touch today to book a free site visit and see how we can create a beautiful, long-lasting resin driveway for your property.
Frequently Asked Questions
What is the best base for a resin driveway?
A compacted MOT Type 3 aggregate base with a porous tarmac binder course provides the best strength and drainage.
Can you lay resin on an existing concrete drive?
Yes, as long as the concrete is stable, clean and free from cracks or oil.
How thick should the base be for a resin driveway?
A typical domestic installation uses around 150 mm – 200 mm of compacted sub-base material.
How long should the base cure before applying resin?
Tarmac usually cures within 48 hours, while concrete may take up to 7 days depending on conditions.
Why does moisture matter so much?
Moisture affects how the resin binds to the base. A damp surface can cause bubbles, clouding and weak adhesion.