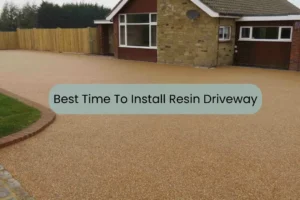
Resin driveways are built to last fifteen to twenty five years, but no surface is completely problem-free. The most common resin driveway problems loose stones, cracks, discolouration, pooling water and stains can almost always be fixed if caught early. This guide explains every common issue, why it happens in Bournemouth and across Dorset, and how to repair it properly.
If you live in Bournemouth, Poole, Christchurch, Ferndown or Ringwood, your driveway faces a unique mix of mild coastal winters, salty sea air and damp autumns. Each of these conditions can shorten the life of a poorly installed surface but with the right repair approach, your resin driveway can look brand new again.
What Causes Most Resin Driveway Problems?
Most resin driveway problems come down to three root causes: poor installation, low-quality materials and environmental wear from Bournemouth’s coastal climate. Understanding which of these is at fault will determine whether you need a simple patch repair or a full resurfacing job.
Poor Installation and Cowboy Contractors
The single biggest cause of resin driveway failure is poor installation. A surface laid without a proper sub-base, the correct resin-to-aggregate ratio, or adequate curing time will start to show problems within months rather than years. Watch for warning signs like patchy texture, uneven thickness and stones that come loose almost immediately. We’ve covered this in detail in our guide to cheap resin driveways.
Low-Quality Materials and Wrong Mix Ratios
Cheap, non-UV-stable resin yellows quickly under sunlight. Aggregates containing iron pyrites cause rust spots over time. Incorrect mix ratios too much resin, or not enough produce loose stones, cloudy patches and weak surface bonds. The choice between resin bound and resin bonded systems also affects long-term performance, as explained in our breakdown of resin bound vs resin bonded driveways.
Bournemouth’s Coastal Climate and Weather Impact
Bournemouth receives around 875mm of rainfall a year, has mild but damp winters, and is exposed to salt-laden sea air across Poole Bay. These conditions accelerate moss growth, encourage staining and put pressure on the sub-base through repeated freeze-thaw cycles. Coastal exposure is a major factor in driveway longevity, as we explore in our article on how long a resin driveway lasts in coastal areas like Bournemouth.
Cosmetic Resin Driveway Problems and How to Fix Them
Cosmetic problems affect how your driveway looks rather than how it performs. They’re usually the easiest to fix and often the first signs of bigger issues underneath.
Loose Stones on a Resin Driveway
Loose stones appear when aggregate fails to bond properly with the resin binder. This is almost always caused by an incorrect resin-to-stone ratio, inadequate mixing in a forced-action mixer, or installation in poor weather. A few loose stones aren’t a disaster, but ignored patches grow quickly.
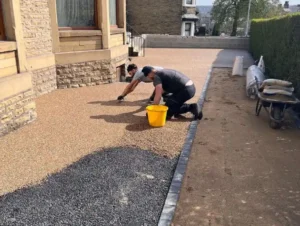
How to fix: Sweep up the loose aggregate. Clean the affected area thoroughly with a pressure washer and allow it to dry for at least 24 hours. Apply a matching resin binder to the bare patch, press fresh aggregate of the same blend into the resin, and use a heat gun to bond the new section seamlessly. For larger areas, professional patch repair is the only way to avoid a visibly mismatched finish.
Resin Driveway Discolouration and Yellowing
Resin driveway discolouration usually means one of two things: the original installer used non-UV-stable (aromatic) resin instead of UV-stable (aliphatic) polyurethane, or the surface has built up surface contamination. Yellowing on lighter aggregates like cream, beige or white is especially noticeable on south-facing driveways in Bournemouth.
How to fix: Clean the driveway thoroughly with a pressure washer and allow it to dry completely. Apply a UV-resistant resin sealer or resin restorer designed for faded surfaces. If the resin itself has degraded chemically, no sealant will fully restore the colour full resurfacing with proper UV-stable resin is the only permanent fix.
Iron Spotting and Rust Stains
Iron spotting appears as small reddish-brown rust spots on the surface. It’s caused by naturally occurring iron pyrites in some aggregates oxidising when exposed to moisture. It’s more common with cheaper, non-iron-free aggregates.
How to fix: Treat the affected area with a diluted oxalic acid solution, then rinse immediately with cold water. Always test a small inconspicuous area first. To prevent it returning, the only long-term solution is replacing the affected sections with iron-free aggregates.
Oil, Grease and Tyre Mark Stains
Oil and grease stains are common on resin driveways used for daily parking. Tyre marks are caused not by rubber transferring to the surface, but by friction heating the resin binder itself.
How to fix: For fresh spills, absorb the liquid immediately with cat litter, sand or sawdust. For set-in stains, apply a resin-safe emulsifying degreaser, leave it for at least 15 minutes, then scrub with a stiff brush and rinse with cold water. Never use solvent-heavy cleaners like acetone or white spirit they soften the polyurethane binder and cause far worse damage than the original stain.
Moss, Algae and Green Discolouration
Green growth thrives in Bournemouth’s damp coastal air, especially on shaded driveways under trees in Ferndown or Ringwood. We’ve published a dedicated post on why your resin driveway is turning green with full cleaning solutions.
Quick fix: Pressure wash at no more than 100 bar with a wide fan nozzle held 20cm from the surface. Treat with a diluted household bleach or proprietary moss killer. Sweep regularly debris build-up is the main cause of recurring green growth.
Structural Resin Driveway Problems and Repair Methods
Structural problems affect the integrity of the surface. These are more serious and usually require professional repair.
Hairline Cracks in a Resin Driveway
Hairline cracks are thin surface cracks usually less than 1mm wide. They’re caused by minor base movement, temperature changes during curing, or the natural expansion and contraction of resin in extreme weather. Most hairline cracks are cosmetic and can be sealed before they spread.
How to fix: Clean the cracked area thoroughly. Apply a high-strength resin sealer a mix of resin binder thinned with white spirit works well into the crack using a plastic trowel. This strengthens the surface and prevents weeds from taking hold.
Deep Cracks and Reflective Cracking
Deep cracks usually indicate movement in the sub-base. If your driveway was laid over an old, cracked concrete or tarmac surface, the cracks below will eventually transmit upwards — this is called reflective cracking. Tree roots, ground settlement and clay-heavy soils common in parts of Dorset all contribute.
How to fix: Chisel out the cracked area to create a clean rough edge, leaving the surrounding stone matrix intact. Mix a fresh batch of resin and aggregate matching the original blend, then pack it tightly into the gap using a plastic trowel. Blend the edges by feathering. For widespread reflective cracking, the only proper fix is removing the surface and laying a new base — see our resin driveway base preparation guide for why this matters.
Lifting, Peeling and Delamination
Lifting and peeling happen when the resin loses its bond with the sub-base. Common causes include moisture trapped underneath during installation, contamination on the original surface, or laying resin over a non-porous base. Once delamination starts, it spreads quickly.
How to fix: Lifted sections must be removed entirely, the sub-base inspected and primed, and a fresh resin layer applied. This is not a DIY repair incorrect primer or trapped moisture will cause the same failure to return.
Sinking, Bumps and Uneven Surfaces
A bumpy resin driveway always reflects an uneven sub-base. The resin surface itself is only 15-20mm thick, so any movement underneath shows through. Sinking patches often appear where the original groundwork wasn’t compacted properly or where heavy vehicles have been parked in one spot too long.
How to fix: Small dips can sometimes be levelled with extra resin and aggregate, but this is rarely a long-term solution. Significant sinking requires excavation, re-compaction of the sub-base, and relaying the affected section.
Drainage Problems on a Resin Driveway
A properly installed resin bound driveway should drain freely through its surface, with no standing water after rain. When it doesn’t, something has gone wrong.
Why Your Resin Driveway Has Puddles
Pooling water means the surface isn’t permeable where the puddle forms. The cause is usually one of three things: too much resin in the original mix (filling the voids between aggregates), a non-porous sub-base underneath, or blocked pores from accumulated debris.
How to fix: Start by deep-cleaning the affected area to unblock pores. If puddles persist, the only permanent solution is replacing the affected section with the correct resin-to-aggregate ratio over a porous base. Permeability is fundamental to SuDS compliance, which we explain in our guide to how resin driveway drainage works and why SuDS compliance matters.
Blocked Permeability and Slow Drainage
Over time, leaves, soil, moss and salt build up in the small gaps between aggregates and block the natural drainage. This is especially common in Bournemouth and Poole where coastal moisture encourages biogrowth.
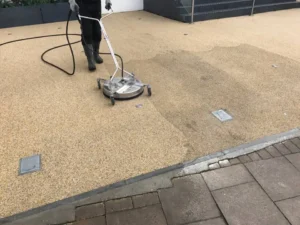
How to fix: Sweep weekly and pressure wash twice a year at low to medium pressure. Regular cleaning is the single most effective way to maintain drainage — and we’ve covered the right schedule in our post on how frequently to clean a resin driveway in UK climate.
Frost Damage and Winter Drainage Issues
Frost damage on resin driveways is rare in Bournemouth’s mild winters but can occur during cold snaps. When water trapped in blocked pores freezes, it expands and weakens the binder.
How to fix: Keep the surface clear of debris going into winter, never use rock salt (use sharp sand for grip instead), and avoid metal snow shovels which chip the surface. For full detail, see our article on how resin driveways handle frost and freezing temperatures in the UK.
Resin Driveway Problems Specific to Bournemouth and Coastal Dorset
Bournemouth homeowners face conditions that drier inland areas don’t. Knowing what’s coming helps you prevent it.
Salt Damage from Sea Air in Poole and Sandbanks
Properties close to Poole Harbour, Sandbanks and Bournemouth seafront receive constant salt spray. Salt left on the surface during cold periods can be pushed into the resin by frost, causing discolouration and weakening the binder over time.
How to fix and prevent: Rinse coastal driveways with fresh water every few weeks during winter. Never use rock salt for de-icing. Sweep up salt deposits before they have time to dry into the surface.
Sand Contamination in Coastal Properties
Driveways near the seven-mile Bournemouth seafront often collect fine windblown sand. This clogs drainage pores and traps moisture against the resin.
How to fix: Sweep regularly with a stiff broom. A pressure wash once a season clears sand from between the aggregate. For homes within a kilometre of the beach, monthly sweeps are sensible.
UV Damage on South-Facing Driveways
Bournemouth enjoys around 1,780 sunshine hours a year more than most of the UK. South-facing driveways take the brunt of this UV exposure, which accelerates yellowing on non-UV-stable resin.
How to fix: Apply a UV-resistant sealant every two to three years. If your driveway was originally laid with aromatic (non-UV) resin, no top sealer will fully fix existing yellowing only resurfacing with aliphatic UV-stable resin solves it permanently.
DIY Resin Driveway Repair vs Hiring a Professional
Not every problem needs a professional, but knowing where the line is will save you money and prevent you from making things worse.
When DIY Repair Is Safe
DIY repair is reasonable for small cosmetic issues: a few loose stones in a localised patch, surface oil stains, moss growth, and very minor hairline cracks. You’ll need a resin repair kit with matching aggregate, a heat gun, a stiff brush, a plastic trowel and a resin-safe degreaser.
When to Call a Professional in Bournemouth
Call a specialist if you see widespread cracking, any sign of lifting or peeling, sinking patches, pooling water in more than one area, or discolouration across the whole driveway. These point to structural or material failure that DIY products cannot fix. A botched repair is often more expensive to undo than the original problem and may void any remaining warranty.
How Much Does Resin Driveway Repair Cost in the UK?
Repair costs vary enormously depending on what’s wrong. As a rough guide for the UK and the Bournemouth area:
- Small patch repair (loose stones, hairline cracks): £150 to £400
- Larger patch repair (1-3 square metres): £400 to £900
- Resealing the entire driveway: £500 to £1,200 depending on size
- Full resurfacing on existing base: £45-£70 per square metre
- Complete removal and replacement: £80-£120 per square metre
Most reputable installers in Bournemouth offer free site assessments. Always get at least three written quotes and check that the contractor uses UV-stable, BBA-certified resin systems.
When to Repair vs Resurface Your Resin Driveway
A patch repair makes sense when problems are isolated to under 10-15% of the driveway and the sub-base is sound. Resurfacing is the right call when discolouration, cracking or loose stones affect most of the surface but the base underneath is still solid. Full replacement is only necessary when the sub-base itself has failed — usually shown by sinking, widespread reflective cracking, or pooling water across multiple areas.
How to Prevent Future Resin Driveway Problems
Prevention is far cheaper than repair. The basics:
- Sweep weekly to keep drainage pores clear
- Pressure wash twice a year at low pressure
- Apply UV-resistant sealant every two to three years
- Address oil and fuel spills within minutes, not hours
- Never use rock salt or metal snow shovels in winter
- Move parked vehicles occasionally to avoid pressure points
Most resin driveway problems start small. The homeowners who avoid the most expensive repairs are the ones who do five-minute maintenance regularly. Our guide to the top maintenance mistakes to avoid and our Dorset coastal maintenance tips cover the full routine.
Need Resin Driveway Repair in Bournemouth? Talk to BH Resin Specialists
At BH Resin Bound Specialist, we repair and restore resin driveways across Bournemouth, Poole, Christchurch, Ferndown and Ringwood. Whether you have a few loose stones, a stubborn stain, or a sub-base that’s seen better days, our team will give you an honest assessment and a transparent quote.
Call us on +44 7734 928740 or request a free site visit. We’ll inspect the surface, identify the cause of the problem, and recommend the right repair — whether that’s a small patch, a full reseal, or a fresh installation on a properly prepared base.
Frequently Asked Questions About Resin Driveway Repair
Can resin driveways be repaired?
Yes. Almost every resin driveway problem can be repaired, from loose stones and stains to cracks and discolouration. Patch repairs blend in well when matching aggregates and UV-stable resin are used. Only severe sub-base failure requires full replacement.
Why are stones coming loose on my resin driveway?
Loose stones mean the aggregate didn’t bond properly with the resin during installation. The usual causes are an incorrect resin-to-stone ratio, poor mixing, installation in damp weather, or insufficient curing time.
How do I remove oil stains from a resin driveway?
Absorb fresh spills with cat litter or sand. For set-in stains, apply a resin-safe emulsifying degreaser, leave for 15 minutes, scrub with a stiff brush, and rinse with cold water. Never use solvent-based cleaners.
Why is my resin driveway yellowing?
Yellowing usually means non-UV-stable (aromatic) resin was used originally. UV-stable aliphatic resin prevents this. A UV sealant can slow further yellowing, but only resurfacing fully restores the original colour.
How much does it cost to repair a resin driveway in Bournemouth?
Small patch repairs typically cost £150 to £400. Larger patches run £400 to £900. Full resealing of an average driveway costs £500 to £1,200. Resurfacing on the existing base is usually £45-£70 per square metre.
Can you reseal a resin driveway?
Yes. Resealing involves cleaning the driveway thoroughly, allowing it to dry completely, and applying a fresh layer of UV-stable resin sealer. Most resin driveways benefit from resealing every two to three years.
Why does my resin driveway have puddles?
Puddles mean water can’t drain through the surface. Either the resin-to-aggregate ratio was wrong during installation (too much resin filled the drainage voids), the sub-base isn’t permeable, or the surface pores are blocked with debris.
How long should a resin driveway last before needing repair?
A properly installed resin driveway should last 15-25 years before major repairs are needed. Small touch-ups like resealing or minor patch repairs may be needed every few years.